


Some of my most technically "correct" images were the ones that gave themselves away.
Everything perfectly exposed. Bright window and dark corner both showing full detail. Nothing blown out, nothing crushed. And it read as fake - because no real camera can do that.
Here's the thing I'd missed: a real camera can only capture so much range between the brightest and darkest parts of a scene at once. Something always has to give. Point at a bright window and the room goes dark, or expose for the room and the window blows to pure white. That sacrifice - the blown highlight, the crushed shadow - is one of the most reliable signals of a real photograph. AI holds perfect detail everywhere, and that impossibility is the tell.
Managing the gap deliberately - deciding what to blow out and what to crush - is one of the fastest ways to make an image read as captured.
These are the eight exposure scenarios I prompt to make an image sacrifice detail like a real camera, with the exact keywords for each.
Let's manage the range.
Why Perfect Detail Everywhere Is Impossible
A real sensor has limits. It cannot hold a bright window and a dark corner at full detail in the same frame - one of them has to be sacrificed. A render has no such limit, and that's exactly the problem.
The Exposure Gap: A real camera can't capture the brightest and darkest parts of a scene at once, so something always blows out to pure white or crushes to pure black. That forced sacrifice is proof a physical sensor was there. AI's default - holding full detail in every zone at once - is optically impossible, and the impossibility is the tell. Decide what to sacrifice, and the image reads as captured.
It's the tonal-physics partner to the Palette Promise and the shadow logic work: color decides the mood, shadows decide the dark, and dynamic range decides what the camera couldn't hold.
The 8 Exposure Scenarios
At a glance:
| Scenario | The sacrifice it makes | Use for |
|---|---|---|
| Highlight retention | Bright zone kept, room drops | window-light lifestyle |
| Deep shadow detail | Dark zone crushed to black | luxury, moody, dramatic |
| Window-lit interior | Window blows, subject holds | interior lifestyle, cozy |
| Backlit subject | Rim glows, face may darken | golden-hour, emotional |
| Product in bright scene | Product lifts, background blows | bright airy product |
| Harsh sun on face | Highlights clip, shadows hard | outdoor portrait, grit |
| Night + practical lights | Lights blow, room falls dark | night, nightlife, authentic |
| Soft HDR (natural) | Balanced without the HDR look | premium, clean, editorial |
Highlight retention
The sacrifice it makes
Bright zone kept, room dropsUse for
window-light lifestyleDeep shadow detail
The sacrifice it makes
Dark zone crushed to blackUse for
luxury, moody, dramaticWindow-lit interior
The sacrifice it makes
Window blows, subject holdsUse for
interior lifestyle, cozyBacklit subject
The sacrifice it makes
Rim glows, face may darkenUse for
golden-hour, emotionalProduct in bright scene
The sacrifice it makes
Product lifts, background blowsUse for
bright airy productHarsh sun on face
The sacrifice it makes
Highlights clip, shadows hardUse for
outdoor portrait, gritNight + practical lights
The sacrifice it makes
Lights blow, room falls darkUse for
night, nightlife, authenticSoft HDR (natural)
The sacrifice it makes
Balanced without the HDR lookUse for
premium, clean, editorial
Now the detail.
1. Natural Highlight Retention
Highlights are the brightest areas of an image - the sky through a window, the specular reflection on a glass bottle, the bright zone on skin lit by direct sun. In real photography, highlights are either retained with detail or allowed to clip to pure white. Retained highlights have texture and color in them. Clipped highlights are pure white with no information.
- Use
- Any indoor scene with a window, product shots where glare or specular detail matters, and bright portraits where the sky or window is visible in frame.
- Avoid
- The creative needs a clean, bright, airy feel - high-key product shots on white deliberately clip highlights for cleanliness.
highlight retention, detail in bright areas
sky detail retained, no blown highlights
retained window highlight, no clipping
highlights held, bright areas with detail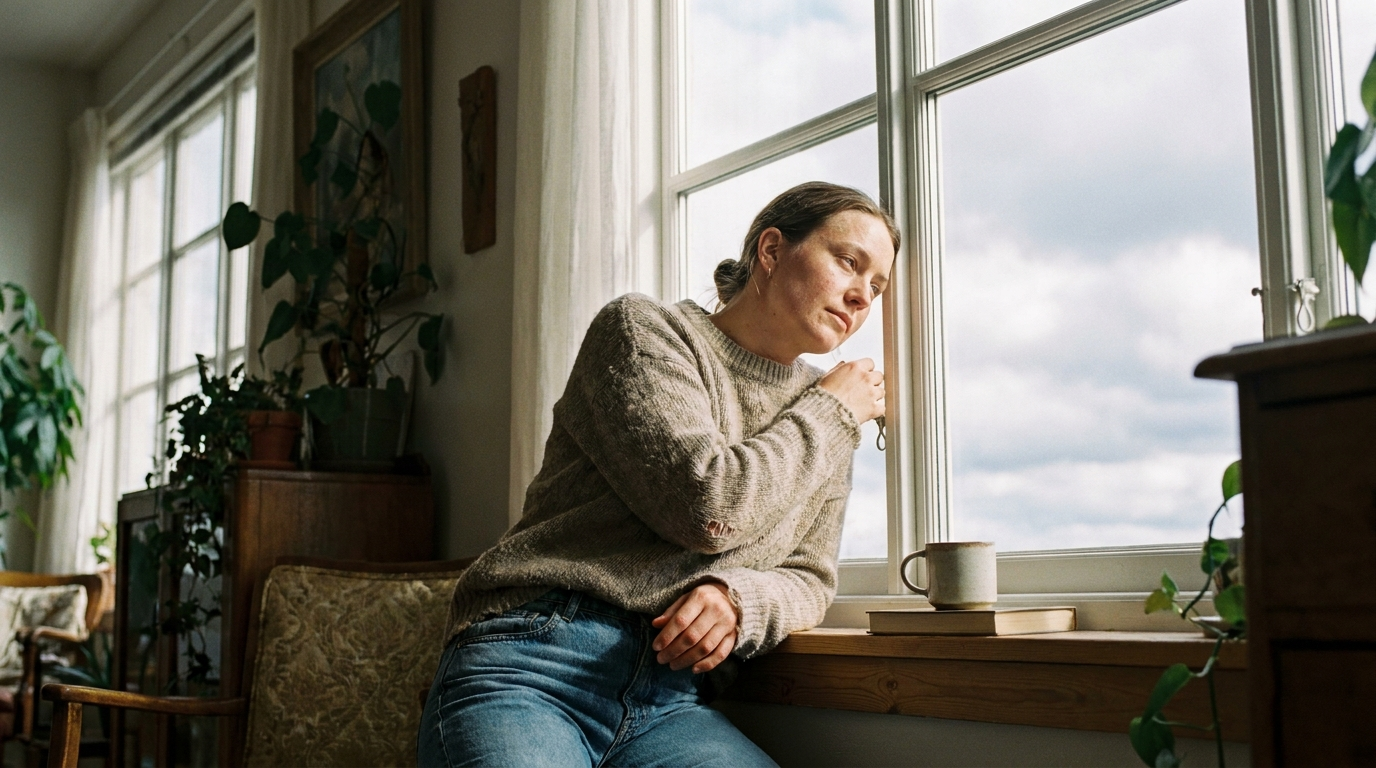
What you see: the window behind her is bright but not pure white - you can read the pale sky beyond it and the soft diffusion of the glass. Her skin in the bright zone is fully lit but not overexposed, with texture still visible. Nothing in the bright half of the frame has been reduced to blank white.
2. Deep Shadow Detail
Shadows that are dark but not black - the texture of a dark fabric still readable, the shape of an object in shadow confirmed rather than lost. This is the opposite of crushed blacks: shadow that has been opened just enough to hold detail.
- Use
- Interior lifestyle with deep shadow, product photography where the subject sits partly in a dark zone, and any creative where detail in the dark confirms the scene.
- Avoid
- The creative needs the drama and mystery of pure black - deliberately crushed shadows lose their impact once you add detail back.
shadow detail retained, dark areas with texture
deep shadows with visible detail
shadow areas readable, not crushed to black
dark zones with texture, detail in shadow
lifted shadow detail, dark but not black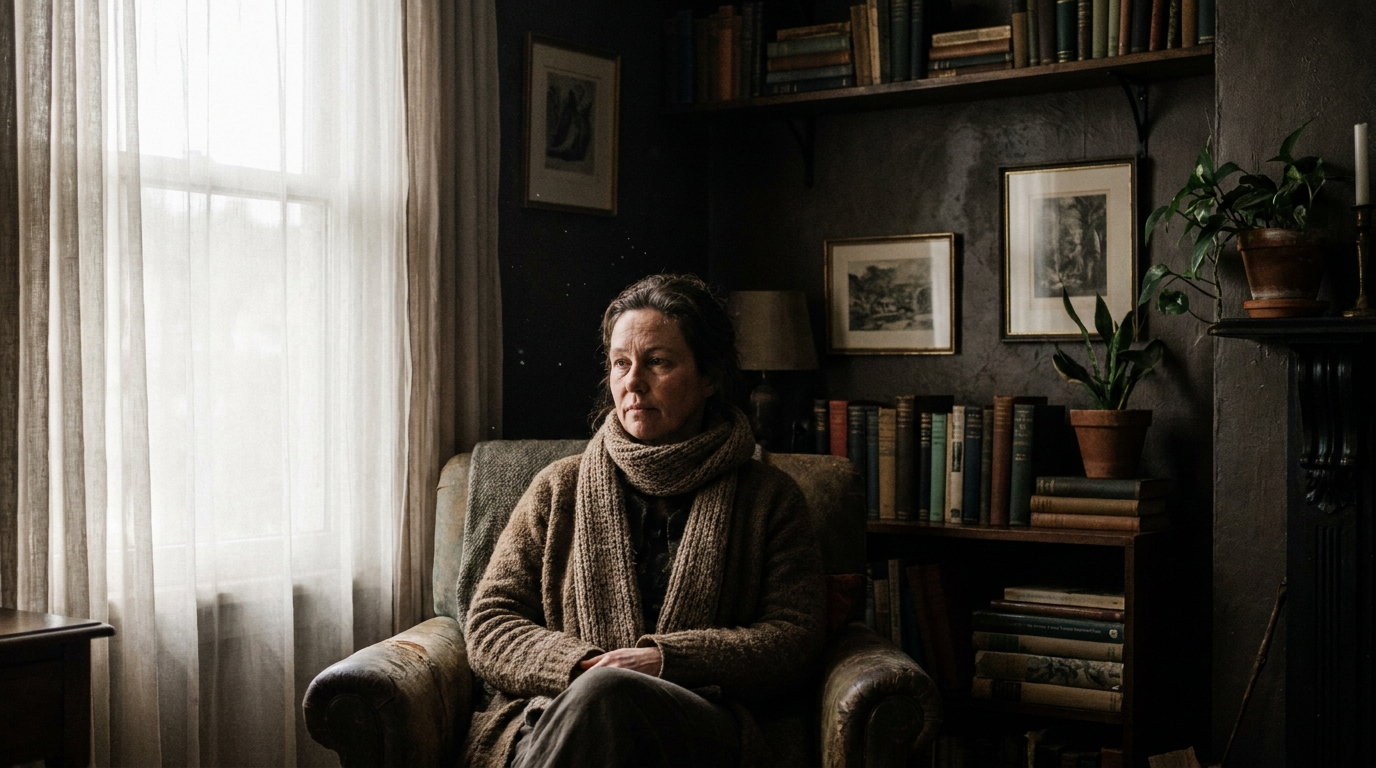
What you see: the darkest areas are not pure black - they're a very dark zone with visible texture. The background shows tonal variation rather than a flat void, and the shadow side of the face keeps skin detail.
3. Window-Lit Interior (Managing the Exposure Gap)
The most common dynamic-range challenge in interior lifestyle photography: a window far brighter than the interior it lights. In a real photograph you must choose - expose for the interior and let the window blow to white, or expose for the window and let the room drop dark. Holding both perfectly is the signature of a render.
- Use
- Interior lifestyle with a window in frame, cozy-inside-bright-outside content, and any creative where the inside/outside relationship is the story.
- Avoid
- You want both zones perfectly detailed - that's exactly what a real camera can't do, so wanting both is wanting the render.
interior lit brighter than window, exposed for room
window blown out, interior correctly exposed
interior exposure, bright window overexposed
natural exposure balance, window sacrifice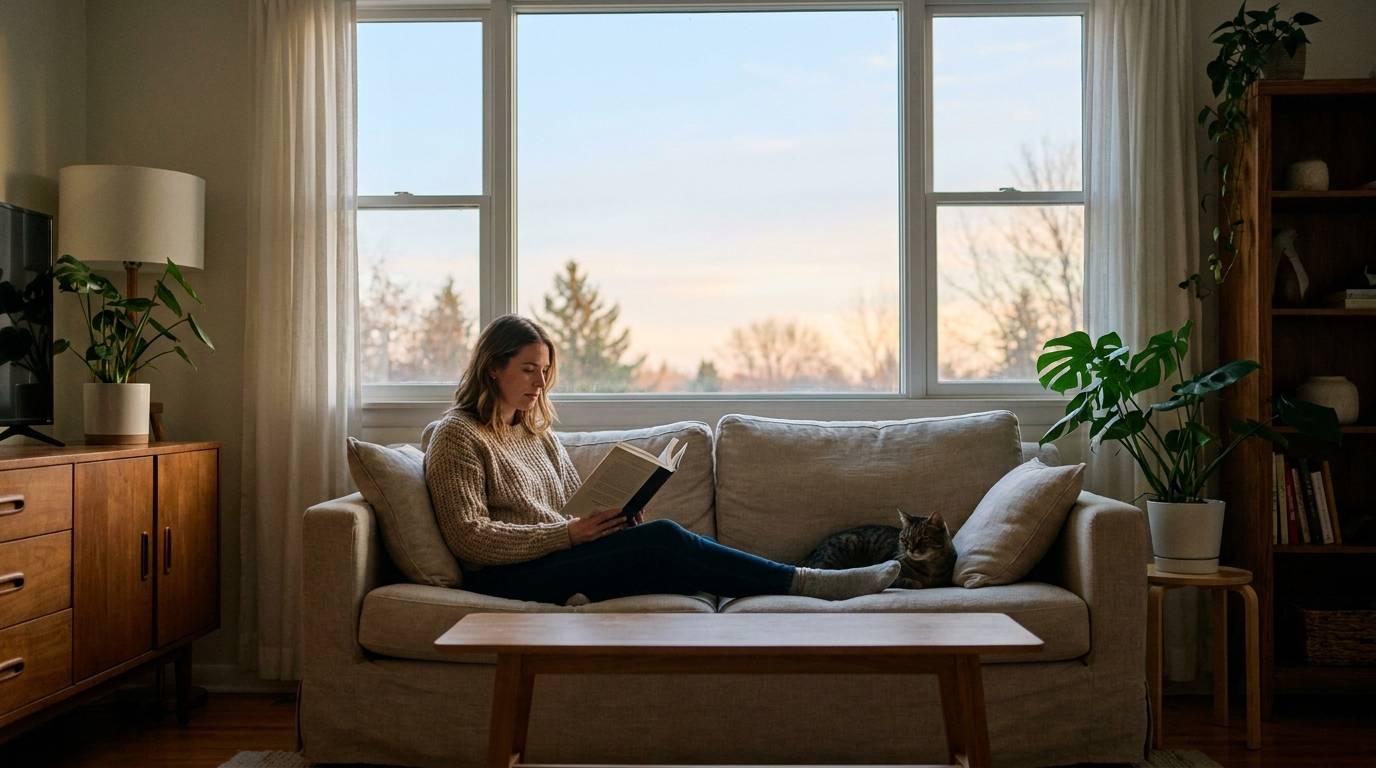
What you see: the subject and the interior are correctly exposed - every surface in the room reads. The window behind is a soft blown-out area with only a suggestion of what's beyond. The gap between inside and outside has been managed the way a real camera would manage it.
4. Backlit Subject (Rim Light & Face Detail)
When a subject is lit from behind - a window, the sun, any strong source - the face drops into shadow while the edges catch a bright rim. Managing this exposure means holding the rim glow and keeping enough face detail to read. The subject is dark but present, edge-lit and separated from a bright background.
- Use
- Backlit lifestyle portraits, golden-hour creative, emotional or intimate content, and silhouette-adjacent hero shots.
- Avoid
- The creative needs the subject fully lit and clearly visible - backlit exposure trades face detail for atmosphere.
backlit portrait, face detail and bright rim
backlit with rim light, subject slightly darker
rim light retained, face exposed to read
backlit subject, balanced face and highlight
golden backlight, face shadow opened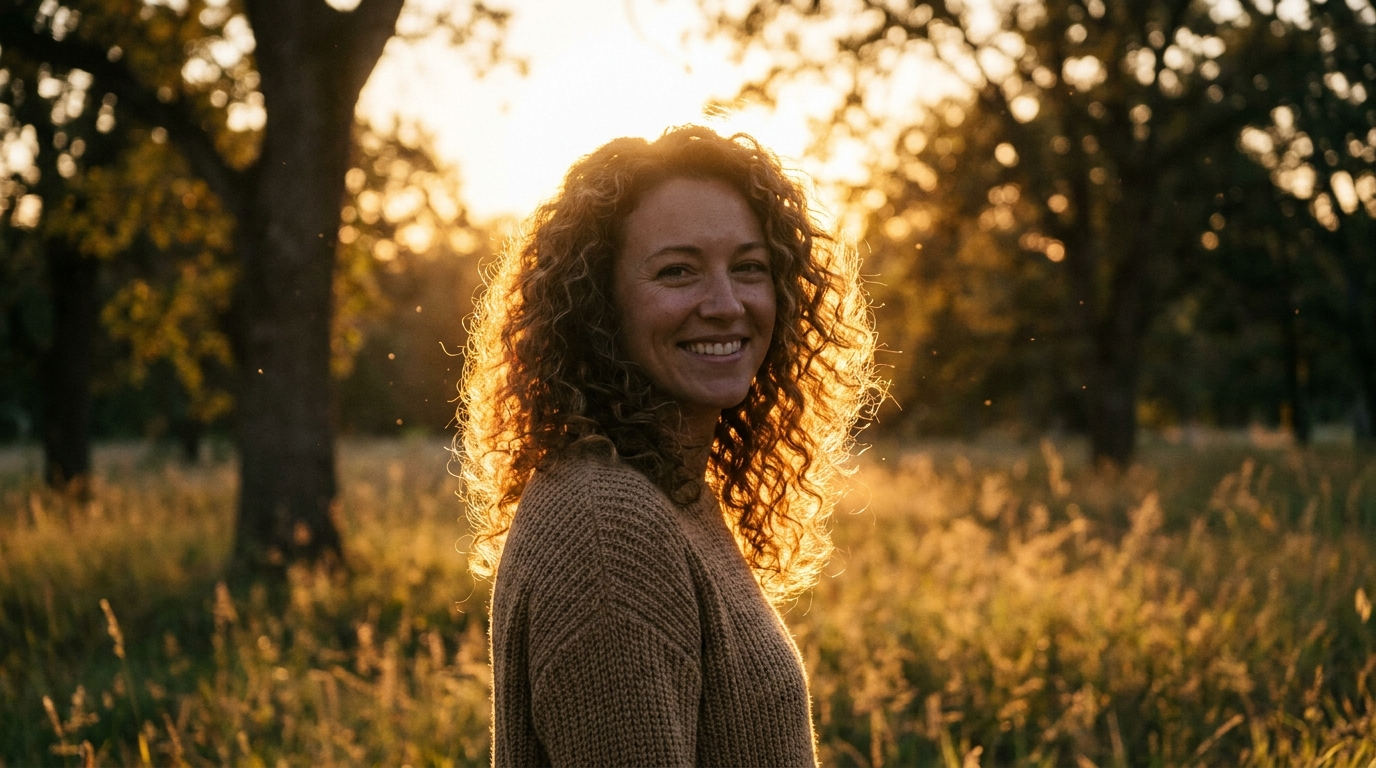
What you see: the rim around her hair and shoulders is bright and near-clipped. Her face is darker than the rim but the features still read, opened just enough. The background is bright and near-clipped - a deliberate high-contrast sacrifice, and it builds directly on natural lighting.
5. Product in a Bright Scene
A product photographed where the environment is significantly brighter than the product itself - a dark bottle on bright white marble, matte packaging in a sunlit room. Managing this exposure means letting the product hold detail while the background lifts or clips. The product's detail is the priority.
- Use
- Product lifestyle where the surroundings outshine the product, outdoor product photography, and any scene where the product must read against a brighter environment.
- Avoid
- The creative needs both product and environment fully detailed - that reverses the challenge and needs different handling.
dark product with bright background, held detail
product exposed correctly, background overexposed
product against bright background, product lifted
dark packaging with bright highlight retained
product correctly exposed, environment clips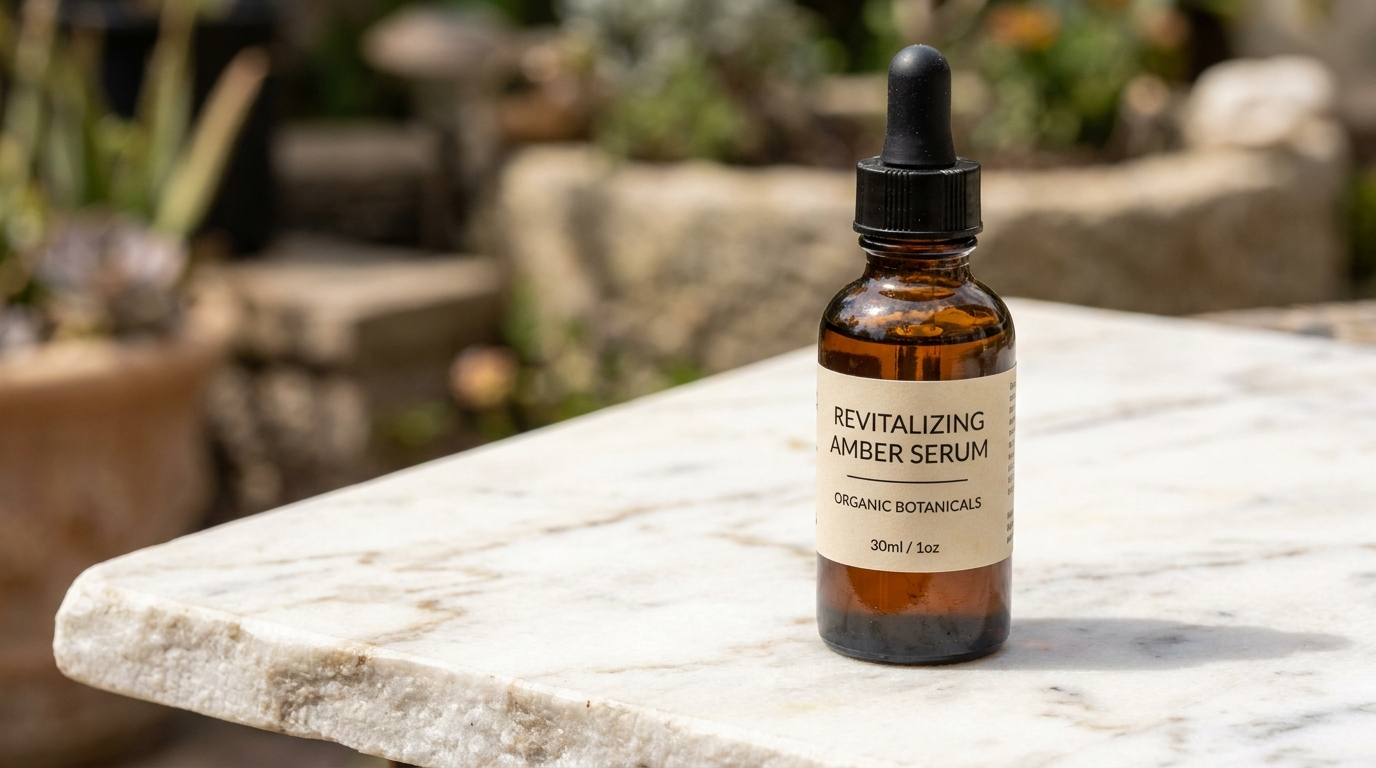
What you see: the dark amber bottle has full detail - the label is readable, the glass catches a highlight, the amber colour is accurate. The marble beneath is bright but keeps its veining, and the background is a soft blown zone.
6. Harsh Sun on Face (The Outdoor Portrait Challenge)
The hardest dynamic-range challenge in outdoor lifestyle photography: direct sunlight creating very bright highlights on the lit side of a face while the shadow side sits several stops darker. The easy failures are a blown-out lit side or a featureless dark side - the real move is retaining detail in both.
- Use
- Outdoor lifestyle in direct sun, summer campaigns, fitness and outdoor content, and any creative shot in harsh midday light.
- Avoid
- The creative needs soft and diffuse light - this scenario is specifically about high-contrast harsh sun.
harsh sunlight, hard shadow and highlight
direct sun portrait, highlight and shadow balanced
outdoor sun, face detail in highlight and shadow
harsh light, controlled shadow side detail
sun-lit portrait, shadow side detail readable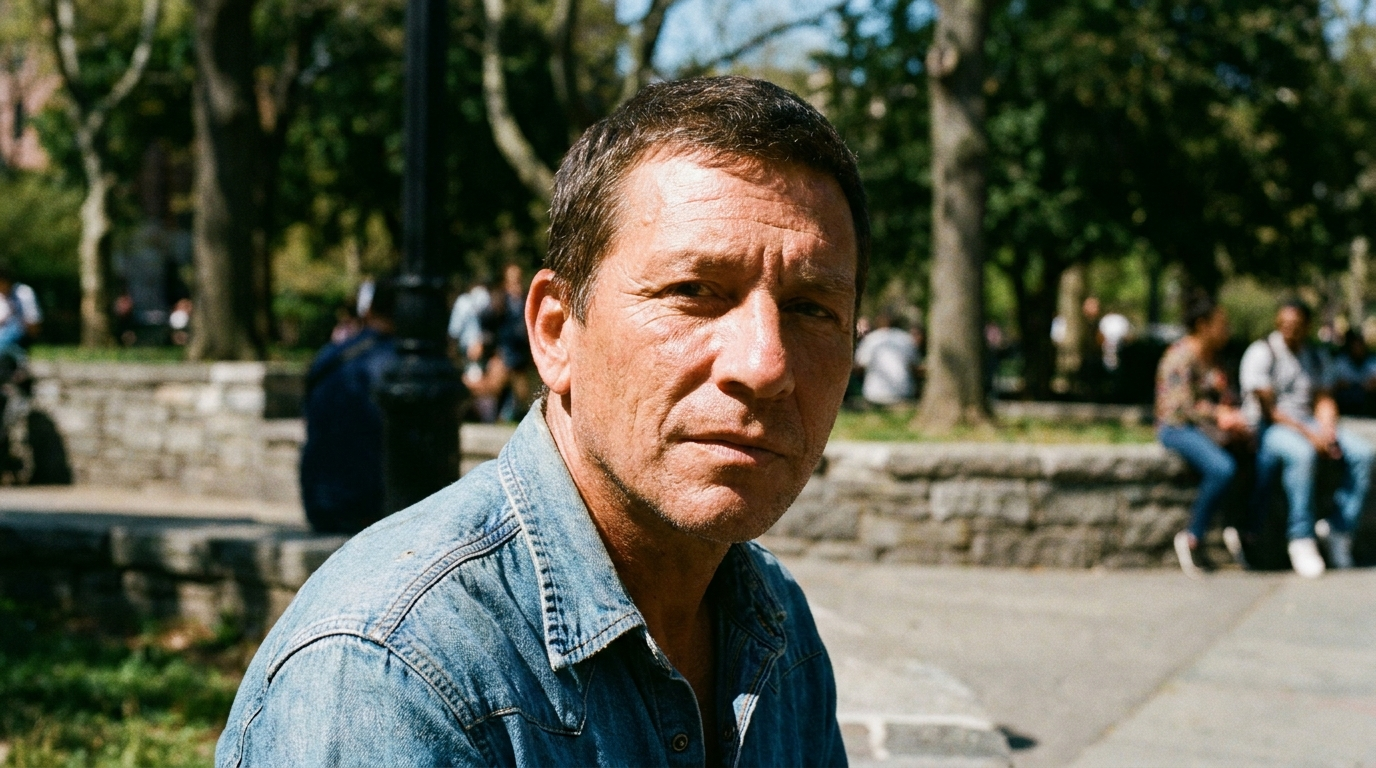
What you see: the lit side of the face is in full sun - bright, high contrast, with short shadows under the nose and chin. The shadow side is a dark rich zone that still reads, with skin texture intact. Both sides hold detail, exactly like a real outdoor portrait in hard light.
7. Night Scene With Practical Lights (Ambient + Point Sources)
Night photography with practical sources - street lamps, shop windows, car lights, a lit phone screen. The challenge is the enormous contrast between bright point sources and the dark ambient environment. The goal is a glowing source and a readable surround, without pretending either one is fully held.
- Use
- Urban night lifestyle, evening outdoor content, nightlife creative, and any scene where the practical light sources are part of the aesthetic.
- Avoid
- The creative wants pure atmospheric darkness - sometimes letting the scene crush around the lights is the stronger choice.
night scene, practical lights and dark detail
street lamp and ambient light
bright point source, dark ambient balanced
neon sign light detail, dark surround
practical lights at night, point sources blown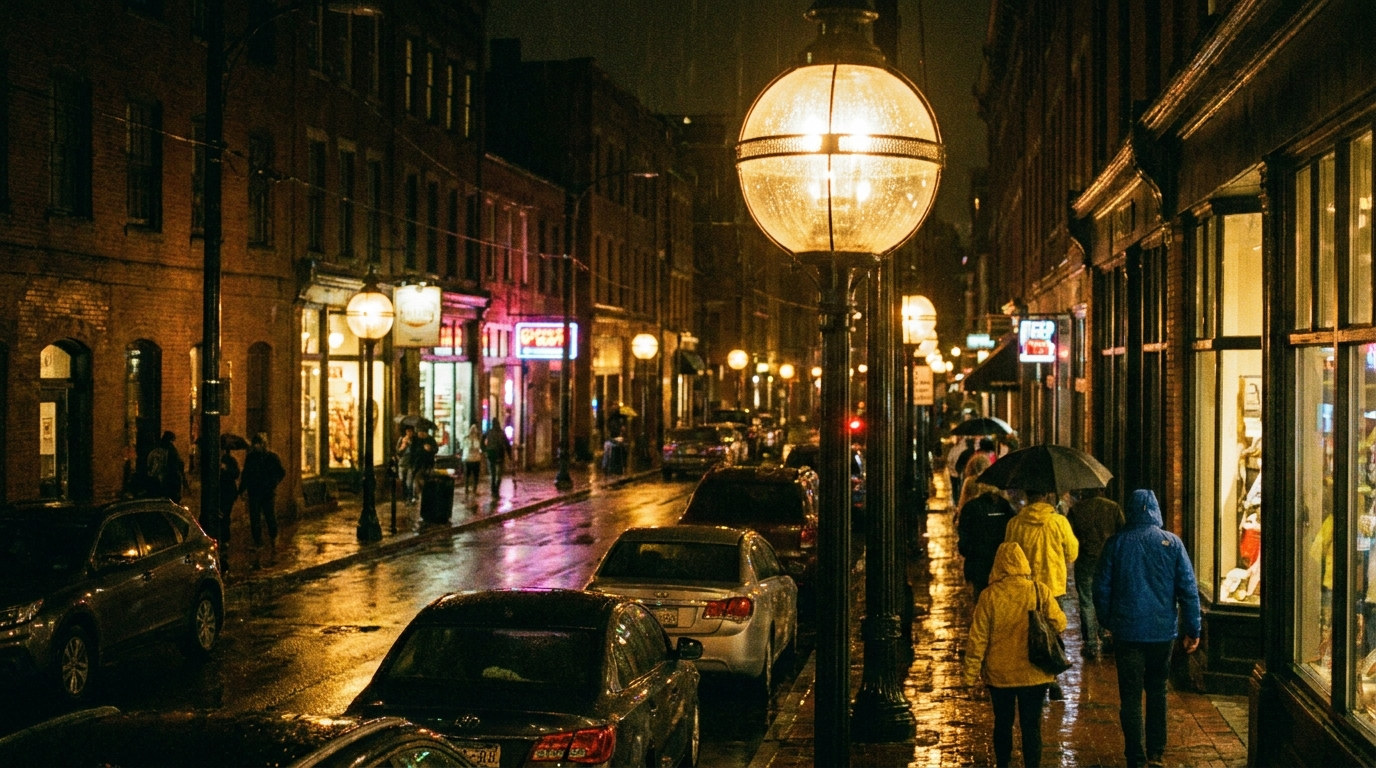
What you see: the street lamps and signs glow - a halo of spill around each one, the bright centre clipped to white. The rest of the scene is dark but readable: wet pavement holding reflections, surfaces beyond the light keeping dim detail.
8. Soft HDR (Natural Detail Without the Processed Look)
HDR done wrong looks like a painting - every shadow lifted, every highlight pulled back, the range compressed until nothing reads as real. Done well, HDR is invisible: it extends the tonal range just enough to hold a little more detail everywhere, without announcing itself.
- Use
- Scenes whose natural range exceeds a single exposure, architectural and interior lifestyle, and outdoor landscape-adjacent creative.
- Avoid
- The creative needs the drama of unmanaged contrast - a natural HDR grade softens exactly the punch you might want.
natural HDR, detail throughout tonal range
subtle tonal balance, natural detail
soft HDR, extended range without processing
natural balanced exposure, no HDR look
extended dynamic range, invisible processing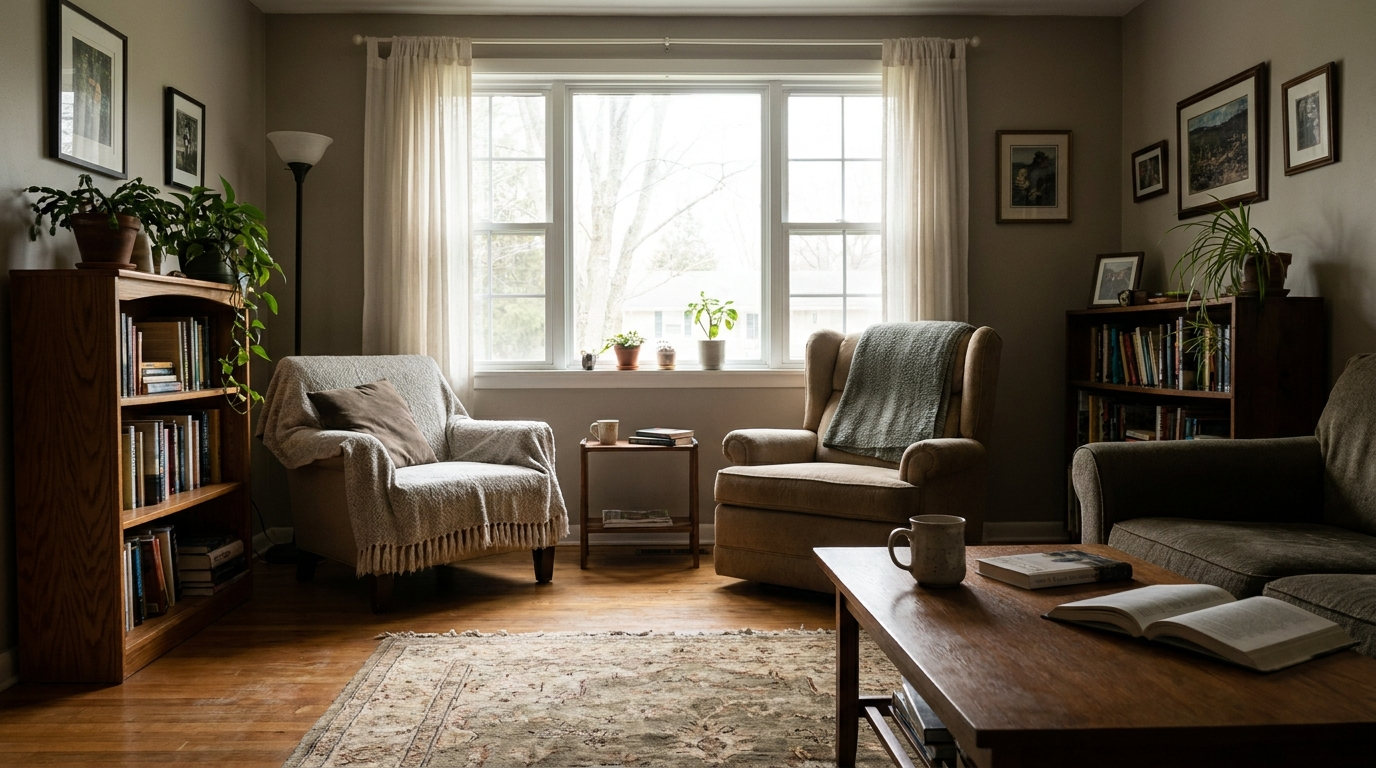
What you see: shadows hold detail and highlights hold detail, but the image still reads as natural. There's no artificial glow, no flattening. It holds everything, and it does it invisibly - the only way HDR should ever look.
The Full Dynamic Range Stack
Dynamic range is a physics decision made after the light and scene are set - you're deciding what the camera couldn't hold:
Interior lifestyle portrait of a woman in her early 30s by a window, morning
light, the room correctly exposed so every surface is readable, the bright
window behind her blown to a soft near-white with a faint suggestion of the
sky beyond, a bright rim of window light on her hair and shoulder near
clipping, her face slightly darker but fully readable, deep shadows in the
corner of the room dark but holding faint texture, 35mm film aesthetic,
photorealistic natural exposure photography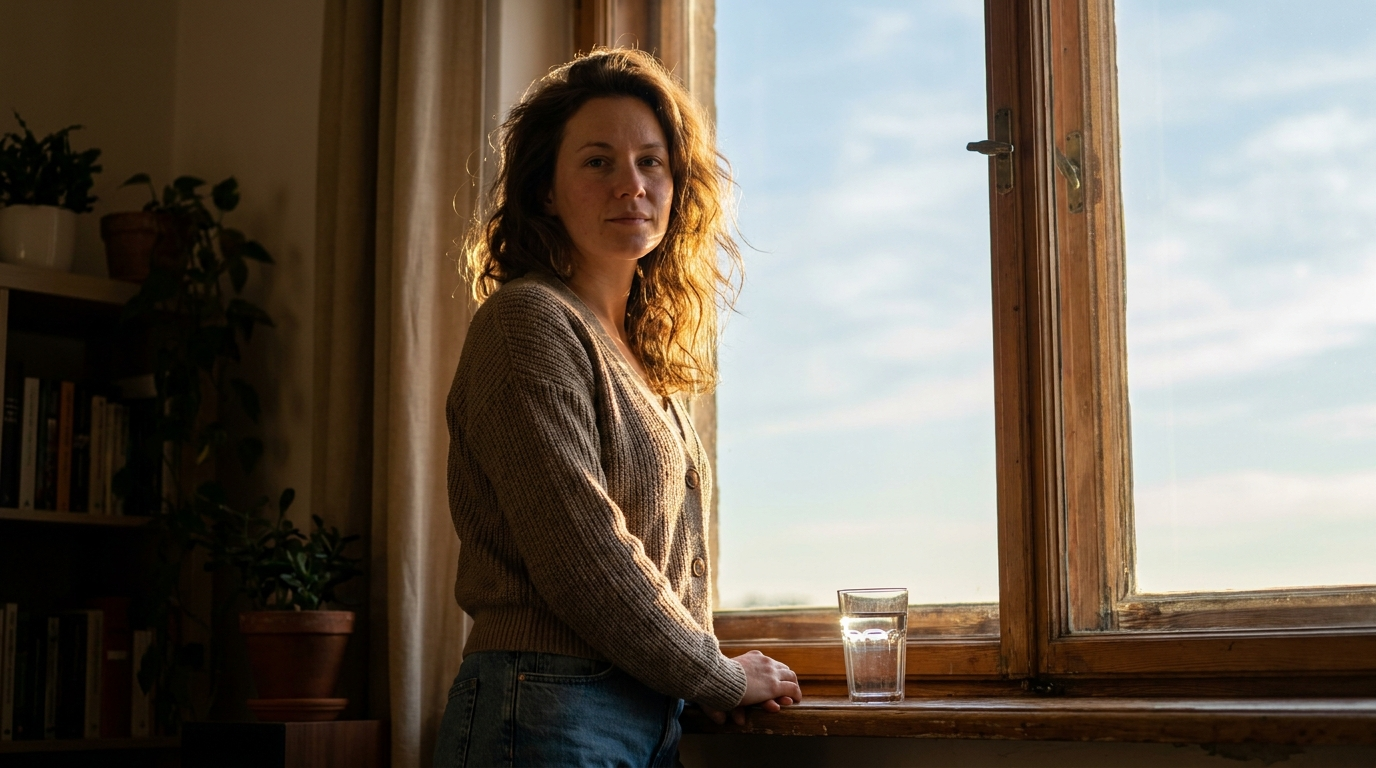
Every zone makes a specific sacrifice or hold, exactly as a real camera would. Nothing keeps perfect detail everywhere - and that's what makes it read as real.
Conclusion: Decide What the Camera Couldn't Hold
Four to lock in:
1. Perfect detail everywhere is the tell. A real sensor can't hold the brightest and darkest zones at once. Something must blow out or crush - and the sacrifice is the proof of a real capture.
2. Decide the sacrifice on purpose. Blow the window, crush the corner, clip the rim. Choose what gives so the thing that matters holds.
3. Match the range to the register. Deep crushed shadows for luxury drama, blown windows for cozy interiors, clipped point sources for night. The exposure is a mood decision too.
4. Real HDR is invisible. If your balanced image glows or flattens, it's over-processed. Natural HDR extends the range without ever announcing itself.
The rule of thumb that closes the module: a real photo sacrifices detail somewhere - the blown window, the crushed corner, the clipped rim. A render holds perfect detail everywhere, which is why it looks fake. Decide what the camera couldn't hold, and the image reads as captured.
So the move: take your "perfectly exposed but somehow fake" interior and regenerate it exposed for the room, letting the window blow to soft white. Same scene. My bet is it stops looking rendered and starts looking photographed - because you finally let the camera sacrifice something, the way a real one always does.
Related: color grading, realistic AI shadows, and the full AI ad prompt library.
Steal my ad concept & hook library
Every prompt, archetype, and hook I use in my own accounts. Updated weekly.
Join the free Skool community